Some children may benefit from use of an activity mobile. Although not as properly equipped as a Little Room, these perceptual aids provide an easy way to hang items so that a child can independently manipulate the objects with his/her hands, feet or mouth. There are many different kinds of mobiles that can be made including a PVC mobile, tabletop mobile, and wheelchair mobile. Some commercially made mobiles are also available and can be adapted for use by changing out the objects that hang from the mobile.
PVC Mobile
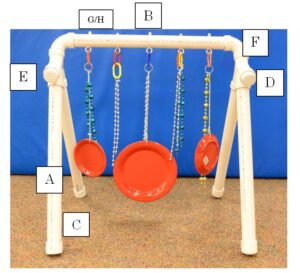
This mobile was constructed with 1 ½ inch PVC pipe. You can choose to use a different diameter. Make sure to select all pieces in the size you choose.
Materials
You will need:
- A – 4 PVC legs measuring 24 inches long
- B – 1 PVC center piece measuring 24 inches long
- C – 4 PVC end caps
- D – 2 PVC plugs
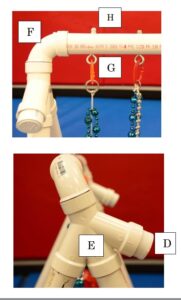
- E – 2 PVC double Wye fittings
- F – 2 PVC 90 degree street elbow fittings (each has one end male one end female)
- G – 5 eye bolts (3 ¼ inches in length for 1 ½ inch PVC)
- H – 5 locking nuts
- PVC primer and glue
- Saw
- Sandpaper
- Drill and Drill bit
- Sand (optional)
Assembly
-
- Purchase a 10 foot long piece of PVC pipe 1 ½ inch diameter and cut into five equal pieces each 24 inches in length. (This will make up the four legs and one center piece. (A & B) You can make the legs longer if you would like the mobile to be taller. Use sandpaper to smooth cut surfaces.
- Preassemble all the pieces together to ensure the mobile will fit properly and all pieces line up. Prior to gluing anything – it is important that the center piece and the elbow and eye fittings are in alignment, or the mobile legs will be crooked. Clean all connection points with primer.
- First glue the center piece (B) to the elbow fittings (F). When doing this, use a flat firm surface, such as a table. Make sure that the elbow fittings rest flat on the table.
- Drill five holes through center piece equal distance from each other. (You will attach the eye bolts after the entire unit is assembled – so make sure the holes are large enough for the eye bolts to go completely through.) The eye bolt should be at the bottom, and the nut will go on top.
 Glue the other end of the elbow fittings (F) to the double wye fittings (E). When doing this, use a flat firm surface such as a table. Make sure that the fitting rests flat on the table.
- Glue one end cap (C) onto one leg (A). Repeat for the other three legs.
- Optional Step: You can now fill the legs with sand, which will help maintain the stability of the mobile once assembled. The sand will add weight to the mobile. You can choose to eliminate this step, but the mobile can tip over more easily without the sand.
- Glue each leg (A) to the double Wye fitting (E). Use the center hole of the wye fitting and one additional hole. (Make sure you glue the legs to the same holes on both sides.)
- Insert the plug (D) into the empty hole on the double wye fitting (E). (You can opt to glue the plug into place.)
- Insert the eye bolts into the holes and secure using locking nuts.
Tabletop Mobile
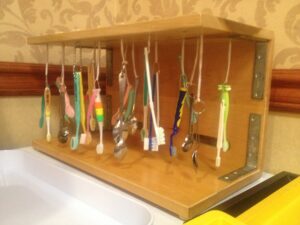
This mobile was designed to allow a child who does not or is unable to bring his or her hands into midline and may also be seated in a wheelchair for much of the time to have access to various objects for exploration. The tabletop mobile can be placed to either side of the wheelchair on a table at the level the child can easily reach. In the video below, you see a young girl playing with a Table Top Mobile that contains a variety of brushes including toothbrushes, scrub brushes, paint brushes, and hair brushes.PLAY FULL VIDEO
Making Your Own Tabletop Mobile
To make a tabletop mobile you will need the following supplies:-
- Three pieces of birch wood – size can vary depending on the size of the child, but item shown below is 22x11x1.
- Four “L” brackets – length 5 inches
- 1/8” elastic – minimal width, use larger widths for children that have increased strength
- plastic tubing – large enough to cover elastic
- loop turner – available at JoAnn Fabric – for pulling elastic through tubing
- drill – to put holes in items to be placed on boards and to drill top of mobile
- Items to be attached to board
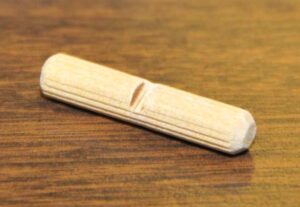
- dowel rods – minimum 1/4” diameter – cut notch in dowels for elastic to rest in
- router
- sander or sandpaper
- polyurethane
References:
Lilli Nielsen, 1992, LilliWorks: Space and Self
Lilli Nielsen, 1989, LilliWorks: Spatial Relations in Congenitally Blind Infants
Lilli Nielsen, 1993, LilliWorks: Early Learning – Step by Step
Lilli Nielsen, 1998, LilliWorks: The FIELA Curriculum – 730 Learning Environments
For more information contact: Penrickton Center for Blind Children, 26530 Eureka Road, Taylor MI 48180 | www.penrickton.com | 734-946-7500
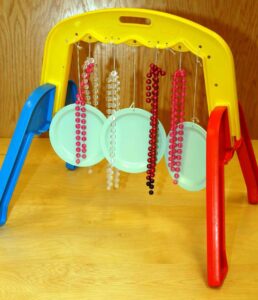
Commercially Available Mobile
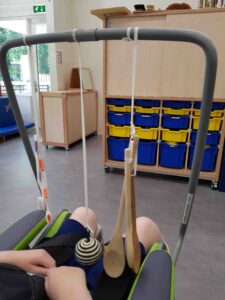
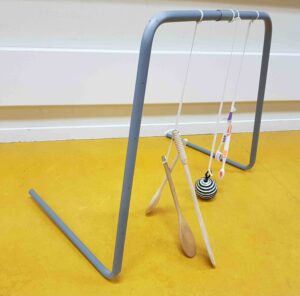
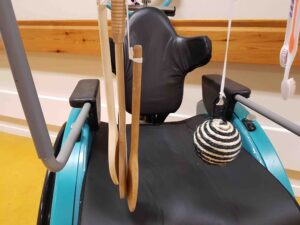
Wheelchair Mobile
This wheelchair mobile was created by Anouk Dirkse-de Kort of Visio.org from the Netherlands. Wooden spoons, toothbrushes, and a woven ball are suspended from a frame over the wheelchair. Note that the wooden spoons and toothbrushes are in groups of 2-3. Contact Anouk if you have questions.